Solar Street Light Troubleshooting: A Professional’s Guide to Diagnosing & Fixing Common Issues
Your solar street light isn’t working? Follow our systematic troubleshooting flowchart. We cover dim light, flickering, no light, and quick fixes vs. part replacements.
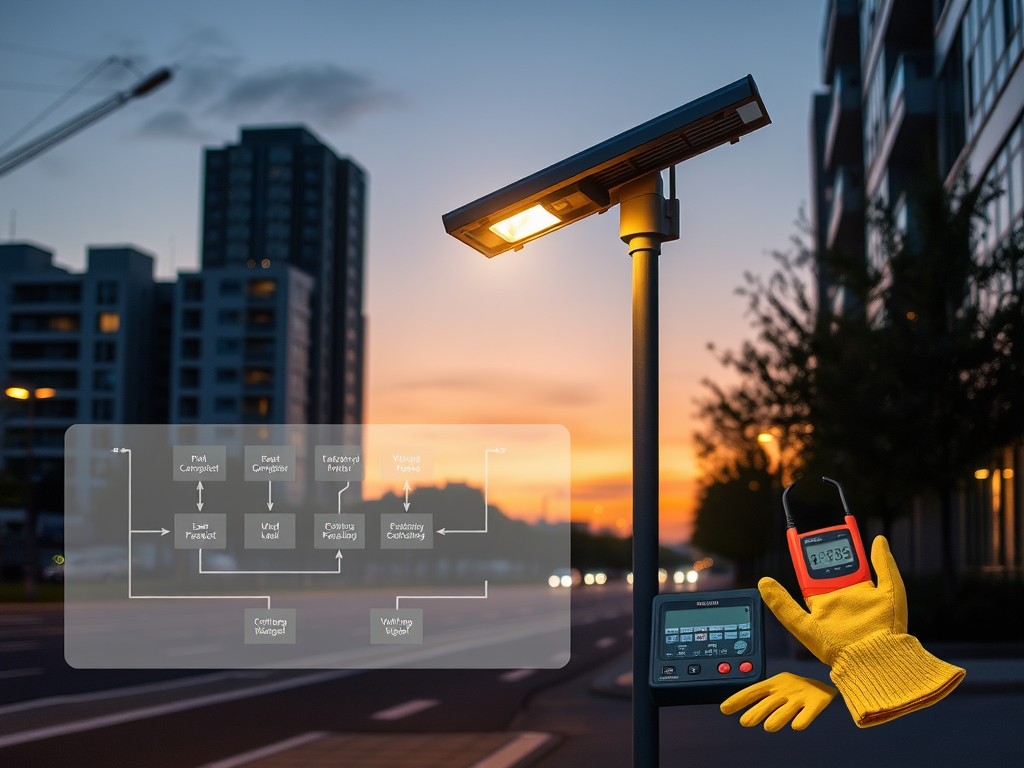
Even the highest-quality solar street lights can experience issues. Before you call for expensive service, use this professional, step-by-step guide to diagnose the problem. Always prioritize safety: wear gloves, use a voltage tester, and cover the solar panel before inspecting electrical parts.
Start Here: The Solar Light Troubleshooting Flowchart
Observe the Symptom: Is the light completely off, very dim, or flickering?
Check the Obvious: Is the solar panel completely shaded (e.g., by new tree growth or snow)? Is it the season (short winter days vs. long summer days)?
Symptom 1: The Light is COMPLETELY OFF at Night
Step What to Check Possible Cause & Fix
- Daytime Check Cover the panel fully. Does the light turn on? No? Problem is in battery, wiring, or LED. Go to step 2.
- Battery Voltage At the battery terminals, measure DC voltage at night. <10.5V (12V system): Battery is deeply discharged.
Fix: Leave panel uncovered for 2-3 sunny days. If voltage doesn’t recover, battery may be dead. - Controller Status LED Check the small light on the controller. No LED: No power from panel/battery. Red/Flashing LED: Error code (consult manual).
- Wiring & Connections Inspect for rodent damage, corrosion, loose plugs. Fix: Clean corroded terminals with vinegar/brush. Reconnect securely. Apply dielectric grease.
- LED Driver Bypass the controller: Connect battery directly to LED terminals briefly. Light turns on? Controller is faulty. No light? LED module/driver is dead.
Symptom 2: The Light is VERY DIM or Runtime is SHORT
Step What to Check Possible Cause & Fix
- Panel Cleanliness Inspect for dust, bird droppings, pollen crust. Fix: Clean panel with water, soft cloth, and mild soap. Do this quarterly.
- Panel Tilt Angle Is the angle optimal for current season? Fix (N. Hemisphere): Adjust tilt to Latitude + 15° for winter.
- Battery Health Measure voltage at dawn (after charging all day). <12.6V (12V system): Battery isn’t reaching full charge. It may have lost capacity (sulfation).
- Partial Shading Check for shade on even a small part of the panel from 9 AM – 3 PM. Fix: Trim vegetation or consider relocating the panel.
Symptom 3: The Light is FLICKERING Erratically
Loose Connection: The #1 cause. Shake wiring harnesses while light is on to see if flickering worsens. Tighten all connections.
Failing LED Driver: Internal component failure. Requires module replacement.
Low Battery & Controller Protection: The battery voltage is dipping below the low-voltage disconnect (LVD) threshold, the light turns off, voltage recovers, and it turns on—creating a loop. Solution: See “Symptom 2” to address charging issue.
Symptom 4: The Light Stays ON During the Day
Faulty Photocell or Controller Sensor: The controller cannot detect daylight.
Quick Test: Cover the panel sensor completely. If the light doesn’t turn on within 5 minutes, the sensor/controller is likely bad.
Controller Settings: The “Dusk-to-Dawn” mode may be accidentally turned off, replaced with a “Test/24H” mode. Consult the manual to reset.
When to Call a Professional vs. DIY:
DIY Fixes: Cleaning panels, adjusting tilt, tightening connections, resetting controllers.
Call Your Supplier/Technician: Battery replacement, controller replacement, LED driver replacement, and any rewiring inside a sealed assembly. Most quality systems have plug-and-play components for easy swap.
Preventative Maintenance Schedule:
Monthly: Visual check for obvious shading or damage.
Quarterly: Clean solar panel.
Bi-Annually: Check and tighten all pole and bracket bolts.
Annually: Inspect battery compartment seal, measure battery voltage at dawn, and verify photocell operation.
Internal Link Suggestion: Need replacement parts? We stock certified controllers, batteries, and LED modules for all our models. Visit our parts store.